3 Care Tips for Your Wood Furniture
 |
 |
When it comes to wood furniture care, tips abound. But beware! Not all tips are equal...nor are they all worth heeding.
There are lots of advisors out in cyberspace, but, well...you know. I know you've heard otherwise, but not everyone who quacks like a duck is a duck.
|
QUACK... |
 |
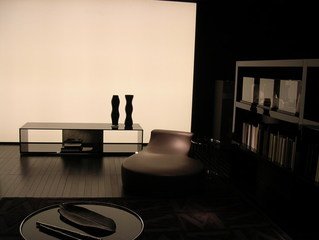
Furniture made of wood never goes out of style, right? And maintaining yours properly will help ensure your favorite pieces will likely stay around to grace your grandchildren's homes. Nice return on investment!
While your beautiful handmade furniture is no doubt an investment you'll want to protect, you don't have to feel anxious about caring for those favorite pieces.
Just taking a few common-sense measures and applying some simple-to-learn habits will help keep your wood furniture looking lovely.
So what are these care-taking habits?
Best-practice wood furniture care tips
The most important thing to keep in mind is that prevention is truly the best medicine. So by taking a few proactive steps, you can prevent a lot of potential furniture woes.
1.) Humidity, temperature, & light - oh my! Take care with these...
You can breathe easy (in so far as your furniture goes...) if you arrange your furnishings wisely.
For example, place wood pieces where they are not likely to be exposed to extreme changes in temperature or to long periods of direct sunlight.
This would mean you would need to keep them away from sources of heat or cold air...fireplaces, radiators, vents, air conditioners, and the like.
If you place an end table right in front of a window where the sunlight streams in for much of the day, treat the window with some kind of covering so that your table won't fade or get dried out over time.
The optimal temperature range for wood furniture is between 65 and 75 degrees Fahrenheit, with a relative humidity of 50-55%, and these are the parameters within which most hand crafted items will thrive (all other things being equal).
And keep in mind that we always want to give relocated furniture a chance to acclimate if it will be encountering an extreme or abrupt change in either temperature or humidity.
How? By letting it stand for several hours in a more moderate, medium-range climate before entering its next "habitat".
(And one more thing to keep in mind regarding climate: storing wood furniture somewhere with temperatures outside the 65-75 degree range, or with humidity levels below 50% is *against the rules*.)
2.) Protection is the best prevention (and vice-versa)
We often hear people talk about protection...protection of the environment; protection of the ecosystem; protection of our homes; protection from strangers; protection online.... I'm sure you can think of a million more right off the bat, because that list goes on indefinitely!
Well, when we talk about our fine wood furniture (hand crafted, especially), it makes good sense to consider ways we can protect it, wouldn't you agree?
Since there are various ways to offer protection, let's start by talking about mechanics....
What do I mean by mechanics? That you should have the spark plugs changed on your buffet? No, of course not.
"Mechanics" here simply refers to the idea that physical things can be physically moved around or placed in ways to achieve our purpose.
So, accessories on a table or shelf can be rearranged from time to time so they will not leave dark "spots" among what might otherwise become faded areas around them.
Periodically rotating decorative items on furniture so they don't sit in the same spot all the time is a good strategy for protecting the top surfaces of wood furniture.
Another good strategy in the mechanics part of protecting wood furniture entails using coasters, potholders, placemats, and tablecloths as appropriate in order to protect wooden surfaces from being damaged by water marks, scalds, spills, scratches, etc.
Speaking of scratches, please keep from sliding anything - like pots or bowls - across the surface of your wood table. Doing so would be a direct invitation for scratches to occur.
Oh, and one other mechanics-based word of advice: if you've got items that typically rest on plastic or rubber materials (...this could be a notebook or binder, a lamp, a bottle, or even a placemat meant to offer protection...), it's not a good idea to place them directly on your furniture.
Certain plastics are made of ingredients which could damage your beautiful finish. A doily or runner underneath would do the trick!
3.) Dusty furniture? Not on my watch (and not on my furniture either)
Start with gentle cleaning solutions and work up to stronger ones as necessary:
- plain water if sufficient
- dish liquid & water solution or another gentle cleanser if needed
- stronger solutions if necessary
We're not lacking in the tongue-in-cheek department when it comes to "our" dust, are we. I mean, we've all heard it, maybe said it. "Don't disturb my dust - it's taken a long time to get it like this" or "the dust bunnies killed my cleaning fairy".
Those sentiments are great for a laugh, but not for our wood furniture. Did you know that dust is really just a bunch of airborne particles that, when given a chance, can build a filmy layer on your furniture and end up scratching that expensive table's surface? Did you get that dirty joke? Not funny.
Dusting frequently keeps this buildup from happening. As a matter of fact, we recommend polishing wood furniture regularly to preserve its natural beauty.
And when you do,always use a soft cloth (cotton or microfiber is best) to avoid damaging the finish. An old, clean undershirt, a cloth diaper, or a microfiber dust rag is a good choice.
Does any of your furniture boast ornate carvings? A duster made from lambswool works well because it attracts and holds dust. Same thing for those hard-to-reach places.
OK, now how to dust most effectively? Damp dust. Not with harsh chemical cleaners, sorite? You should always start with just water, and if that doesn't fit the bill, you can make a gentle solution of water and dish-washing liquid.
You can test your homemade solution on an inconspicuous spot with a swab (or your index finger wrapped tightly inside your cotton cloth). An example of a good spot to test might be the inside of a chair leg. Every piece of furniture has its discreet areas, so just look around until you find one to test.
The way to test the reaction of the finish is to touch it with the swab dipped in solution. If no unpleasant reaction occurs, slide the swab in an S shape. If the finish isn't going to like that cleaner, you should be able to tell by looking.
If all is well, then it's okay to wipe down a larger area, and then, if no harm done, wipe that baby down 'til it's free of dust. Just be sure not to saturate the wood. Your wiping rag should remain barely damp, so wring it out well. Rinse often as you go along, too. Then follow behind with an absorbent, lint-free towel and buff dry.
Cleaning Tip of the Day
Some of you have an artist or two at home! Enjoy them and their art all you can.
Even after my great grandmother's maple coffee table has become the (gulp) the canvass, you ask?
Here's a cool tool (and not just because it has been in the fridge...)
Yes, it's mayo! And it's an antidote for crayonitis of the wood. Spread some on your artist's waxy mess, let it sit for a couple of minutes, and then procede to gently rub the spot clean with a damp cloth and buffing with a dry cloth.
Our ads...the advertisements we choose to share with you here on our site are always meant to add some kind of value to your life... do you have a problem you need solved? Is there something you need to get your hands on? Or maybe just want to have? Let us know if you're on the look-out for something specific. We're listening!
(Psssst - We've got a form for that!)
We are all glad you're here, and we hope you stick around, take a tour of our site, get to know us and let us get to know you by interacting with us....
If you like something, feel free to let us and others know.

If you don't like something, please just let us know = and give us a chance to change or otherwise address it, OK?
We value you!

We want you to know that our site participates in affiliate marketing, which means we can get referral commissions for purchases made through some of the links we provide on our pages.
Does this affect your pocketbook (e.g. would you pay more for a product if you found it through an affiliate link?)
Absolutely not. You would pay the same for an item whether you found it by following our link or by surfing the net or using a search engine.
There are two reasons we use affiliate links:
1) to share a resource with you, which also expands our own offerings, in a sense, & makes our site more attractive in a global environment
2) to supplement our earnings as we work full time from home.